
This is how to change the oil on a Suzuki TU250, as per Suzuki’s own factory service manual. The TU250 oil change is relatively easy. By the time you’re done with this walkthrough you’ll be able to change the oil yourself, exactly how they would do it at a Suzuki dealership. It’s a valuable skill to have and will save you a ton of money over the years.
Included will be what tools and parts you’ll need (and the best prices I found for them), what to do before you change your oil, the steps as outlined in Suzuki’s service manual, what to look out for and be careful with along the way, and what to do after your oil change to make sure your work was done right.
Tools you need for a Suzuki TU250x oil change
- 1.5 litres of 10W-40 semi-synthetic motorcycle oil
- K&N KN-136 oil filter
- Torque wrench (even this cheap $35 one promises to be within 4% accurate)
- A socket set with a 10mm bit and a 17mm bit
- A low profile oil drain pan
- Gloves, rags, and other supplies to clean up any spills
- This Black Widow motorcycle table lift isn’t necessary but it sure made the job easy and it wasn’t too expensive (full review here)
You can change a Suzuki TU250X oil and filter in 5 steps:
- Remove the oil filler cap and remove the oil drain bolt
- Take the oil filter cover off and remove the oil filter
- Relubricate and replace the oil seal, oil filter, spring, and oil filter cover
- Install the oil drain plug to 23 N·m (16.5 lbf-ft)
- Fill with 1.5 litres of clean 10W-40 motorcycle oil and check the level


Before you start your Suzuki TU250x oil and filter change
There are a few things that aren’t actually cover in the Suzuki TU250x service manual, but that you should know, before you get started. The following are considered best practices though they are not actually mentioned in the factory service manual:
- Warm oil will drain out more easily and more quickly. I recommend letting your motor run for a few minutes, just enough to warm up the oil, but not enough to get hot enough to risk burning you.
- The bike needs to be in a fully upright position, not on a side stand, to get all the oil out, and to check the oil level after you’re done. Use a wheel vise, stands, or just ask a friend to sit on the bike and hold it upright while it drains.
- I recommend checking your oil level before you start your oil change, that way you’ll know if your TU250X has been burning oil or losing oil since your last change. See end of guide for instructions.
- Make sure your oil fill cap isn’t seized before you drain the oil out, otherwise you could end up with no oil in your motorcycle and no way of getting oil into it. Being stranded isn’t fun.
Remember: You should watch the video above and read through all of the instructions before you get started. The video shows you all of the steps, which should make learning how to change your own oil and filter on your Suzuki TU250 really easy.
If you still have some questions or need help with something, just leave a comment at the bottom of this page and I’ll answer your questions.
Time needed: 30 minutes.
How to change the oil on a Suzuki TU250x
Changing your Suzuki TU250’s oil and filter can help you save money that would otherwise be spent at a dealership. If you follow these five steps from Suzuki’s service manual, you can do it yourself, just like a dealer would:
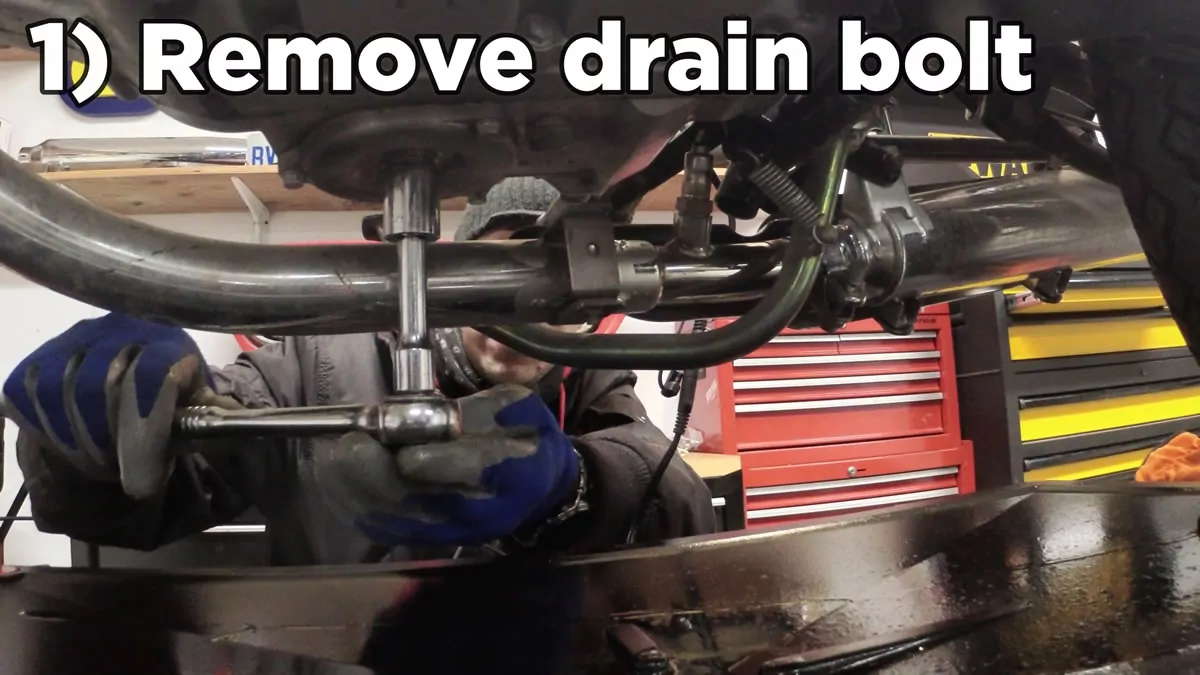
Step 1) Remove the oil drain bolt
The Suzuki TU250X oil drain plug is on the TU’s right side, almost right next to the rear brake lever.
It sits in the middle of a donut looking shape.
Use a socket wrench and a 17mm bit to remove the oil drain plug.
After the oil has drained out you can almost remove the three surrounding bolts to gain access to the oil screen.
Wipe the oil screen clean and replace it and the cover, but do not replace the drain plug yet.
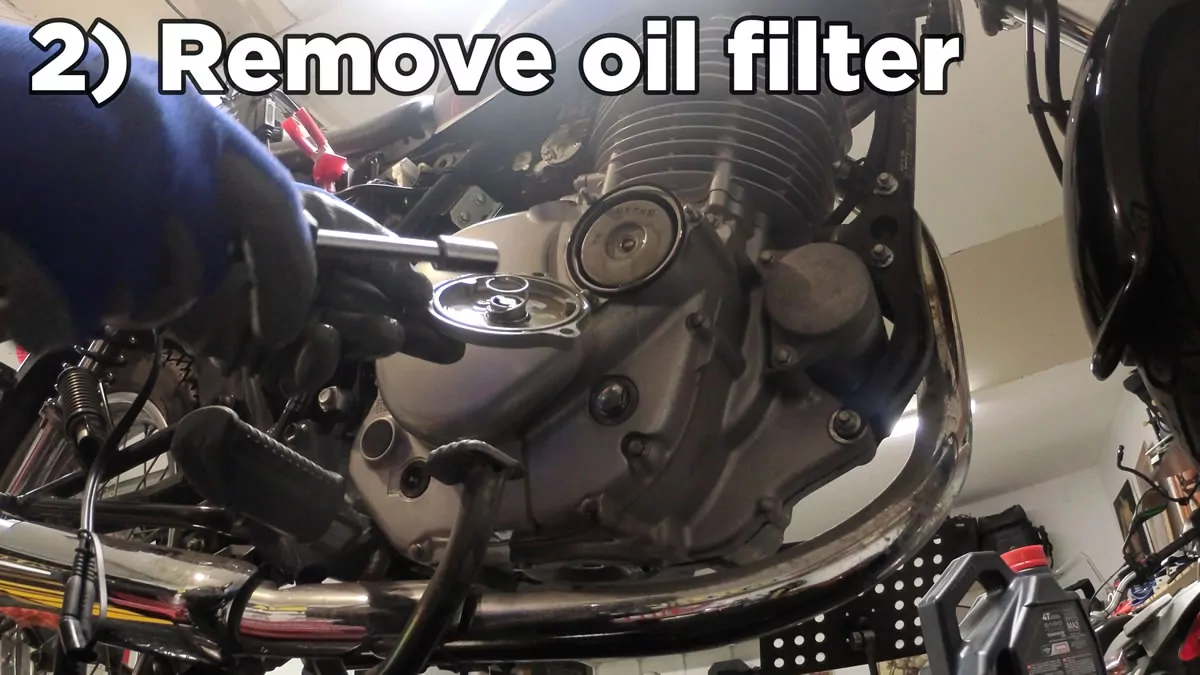
Step 2) Remove the oil filter cover, spring, seal, and oil filter
The TU250’s oil filter is located on the right side of the bike beneath the cylinder.
The oil filter is covered by an oil filter cover, a spring, and a gasket (seal).
Remove the oil filter cover by removing the three 10mm nuts holding it in place.
Pay attention to how tight the bolts are before you remove them, so you know how much to retighten them.
Carefully remove the oil filter cover, spring, and seal, and remove the oil filter.
Pay attention to which direction the oil filter goes in when you remove it.
Inspect the oil filter gasket for any signs of wear and consider replacing if necessary.

Step 3) Install the new oil filter
Insert the new oil filter.
Lubricate both sides of the oil seal to stop the oil filter cover or seal from seizing on to the motor.
Lubricate the seal by running fresh clean oil on both sides of it.
Put the spring back in place and put the oil filter cover, spring, and seal, back over the oil filter.
Suzuki’s service manual doesn’t give a torque specification for the three 10mm nuts, so tighten them to as snug as they were when removed.
Do not go too tight or you’ll risk damaging the bolt threads, but do not go too lose or you will have oil leaking.
Note: User ArizonaAL on TU250Riders says the torque specification is 5.5 N-m or 4.0 lbf-ft.

Step 4) Re-install the oil drain plug
When the TU250X is completely done draining old oil out, re-install the oil drain plug.
First, you should make sure that the washer (o-ring) is in good shape, and if not, replace it.
Wipe your drain plug clean before installing, then lubricate the washer and install.
The torque specification for the drain bolt is 23 Nm or 16.5 lbf-ft.
A torque wrench lets you set a wrench to a given tightness, for example 23 Nm. The wrench will let you know when you’ve reached the desired specification.
Using a torque wrench helps you avoid undertightening a bolt (which could cause a leak) or overtightening a bolt (which could cause damage to your engine casing).
To avoid running into problems, new motorcycle DIYers should consider getting an cheap but effective torque wrench like this one.

Step 5) Pour in fresh oil and check the level
If you replaced your oil and filter, pour in 1.5 liters of 10W-40 semi-synthetic motorcycle oil.
Then, don’t forget to check your oil level to make sure everything was done right.
How to check the oil level on a Suzuki TU250
 Too much and too little oil in your TU250 can both be damaging to your engine, so it’s critical that you always check your oil level after an oil change. Here’s how to check your TU250’s oil level:
- Place your Suzuki TU250 in the upright position, straight up, not on the side stand.
- Start the motor, let it run for a minute, and turn it off.
- Check the oil level window on the right side of the motorcycle.
- Wait a minute for the oil level to come up (it will go down when the motor is running).
- When the oil level has come back up, make sure it is between the F (Full) and L (Low) indicators.
If the oil level is over F in the window, let a little oil out of the drain plug and recheck your level.
If the oil level is below L in the window, add a little more oil in your Suzuki and check your oil again.
Don’t have a wheel vice to keep your TU250 upright? Just have a friend sit on the bike and hold it upright while you check. Your oil level cannot be checked on its side stand. If you do that you will overfill the oil and damage the engine.
Conclusions
Suzuki TU250 oil changes are an easy 5 step process. By following these instructions you can do it exactly as outlined in Suzuki’s factory service manual yourself, and save some money you would otherwise pay the dealer to do it. If you have any questions, you should check out the video above. If you still have questions, or if you just found this guide helpful, please leave a comment down below!
Solid tip on that torque wrench winding back to zero. Straight path to messing it up if you leave the tension on
Rad video, thanks a bunch!
Check out that adorable filter, eh? So cute! hahaha