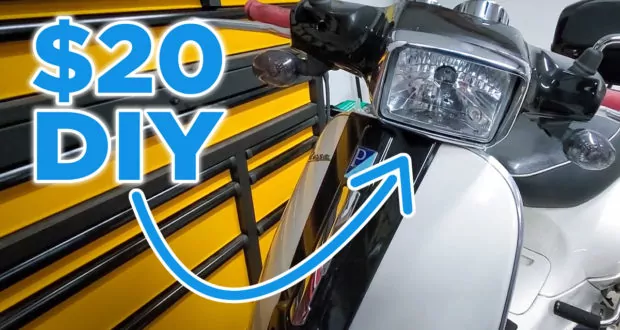
Installing an LED headlight on your Vespa is a great way of making your scooter rides safer. You can easily install an LED headlight yourself. In this how-to tutorial and video I’ll walk you through it step by step.
Installing an LED headlight in your Vespa will help you see much better, make you more visible to others on the road, and reduce the load on your Vespa’s electrical system. You can upgrade your Vespa to an LED headlight by removing the handlebar cover and replacing the original H4 headlight with a new LED bulb.
By following these steps you’ll be able to make your Vespa rides much safer for only about $20.


Vespa LED headlight upgrade
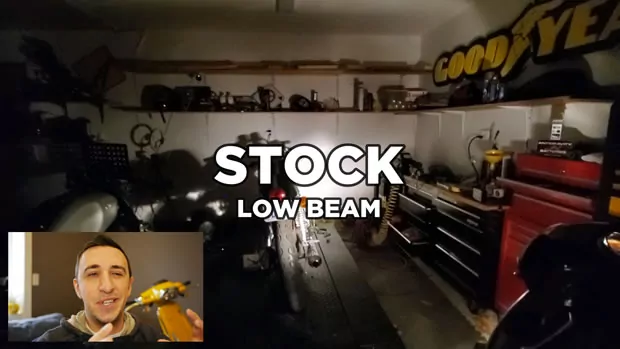
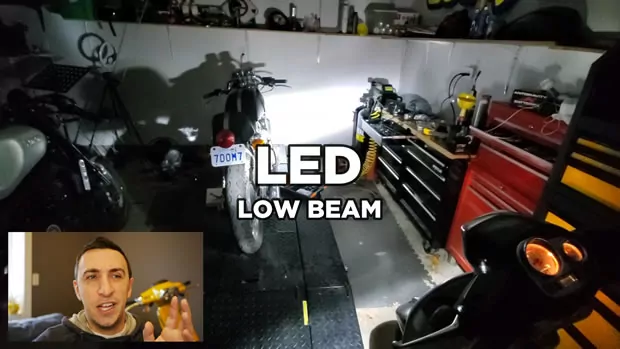
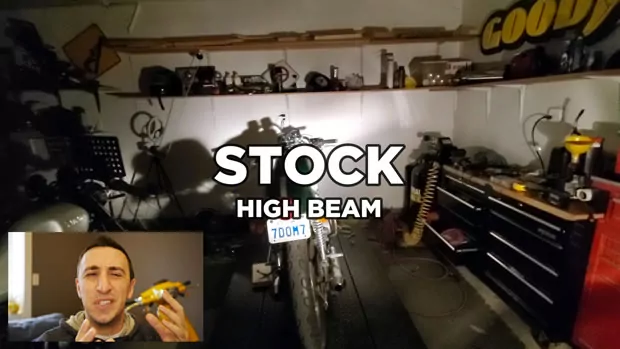
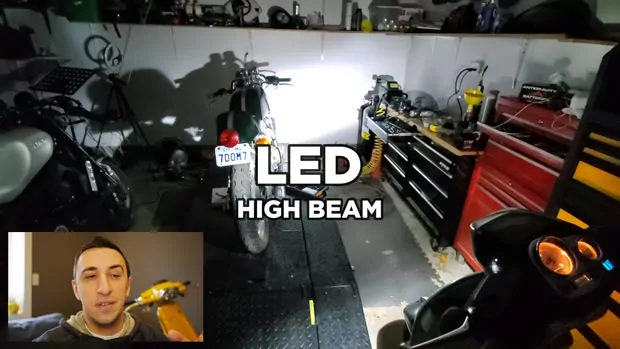
Upgrading your Vespa to an LED headlight can have immediate advantages. The original H4 headlight in your Vespa has a very weak low beam, and an adequate high beam. We’ll do some before and after comparisons so you can see the benefits of upgrading it.
What you’ll need:
- $20 low-wattage LED headlight (or this one if you have a 50cc or want easier installation)
- Sand paper or a knife
- Philips screw driver (+)
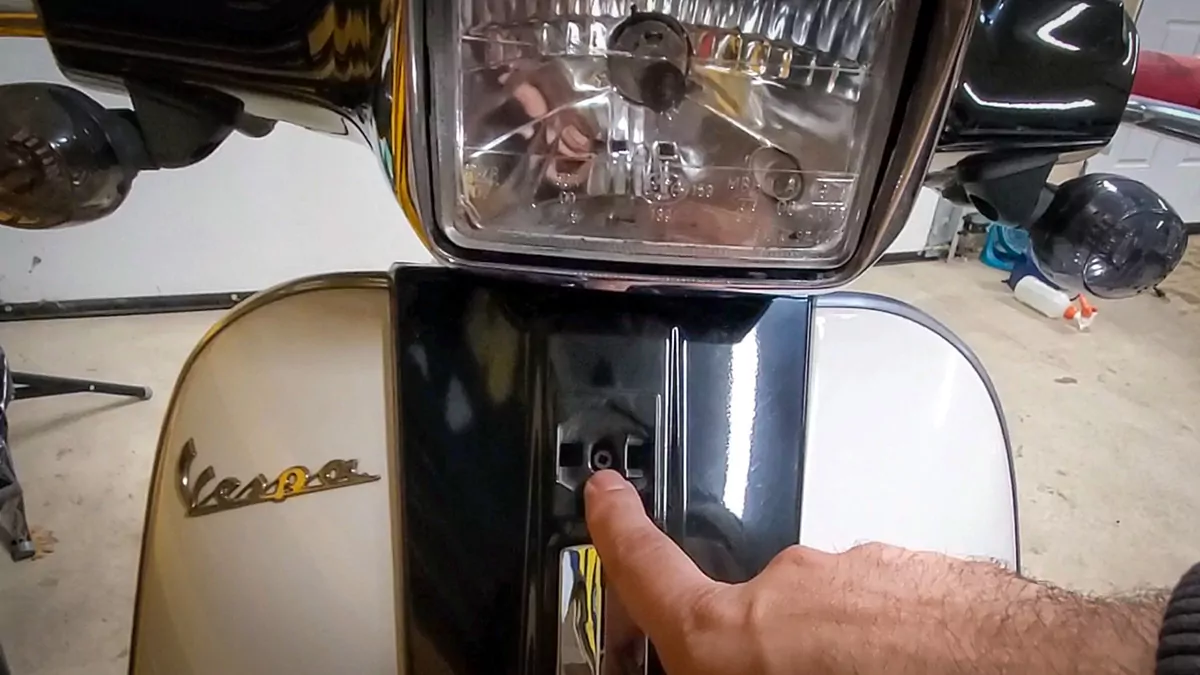
Step 1: Remove the horn cover panel
Remove the blue Piaggio cover under your headlight by putting a screw driver under it and prying upwards.
Under that cover you will find one screw. On S-model Vespas like this Vespa S150 (review here) there may also be a second screw to remove towards the bottom of this same panel about a foot beneath it. On the Vespa LX and many other models there is no second screw.
Step 2: Remove the handlebar surrounds
With the horn cover panel you will have access to a screw directly front and center under the headlight.
This screw holds the front handlebar surround in place. Remove it.
Sit on the Vespa facing forward and you’ll see two screws , one on either side, facing forward. Remove those two screws.
Remove the handlebar surrounds.
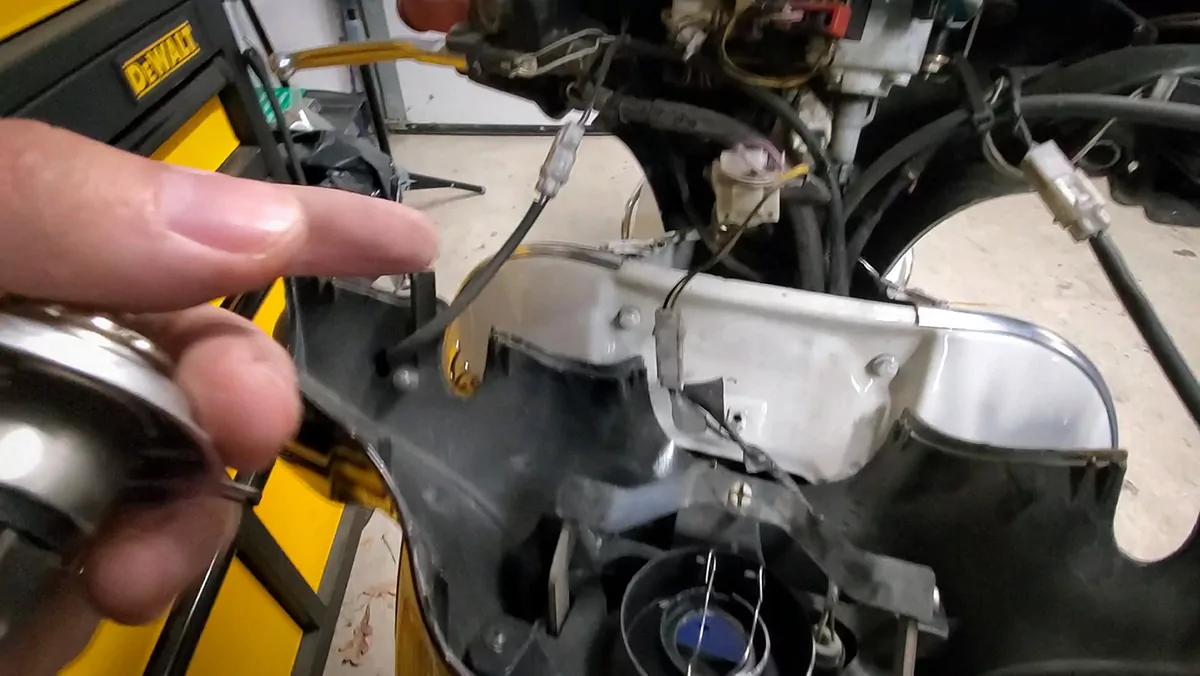
Step 3: Remove the original headlight and test the LED light
There are two clips holding the black rubber backing behind the headlight in place. Unclip them.
Remove the original headlight. If you haven’t already bench-tested your new LED headlight, turn your headlight on to make sure it works.
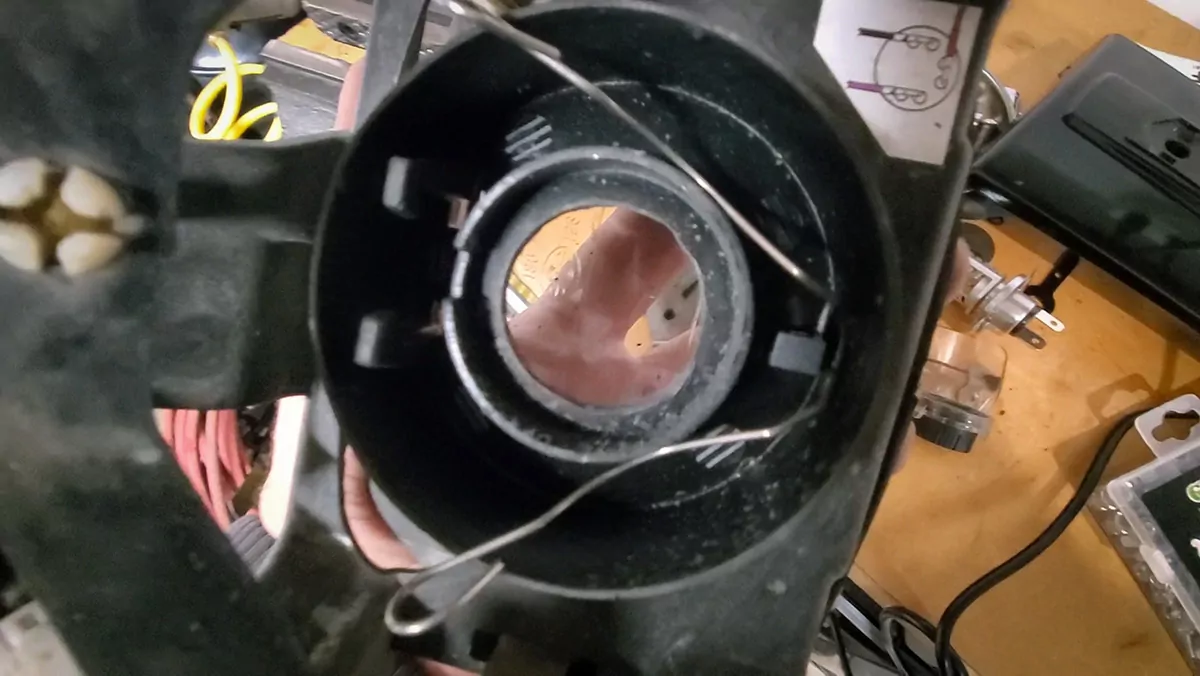
Step 4: Make the LED fit
The LED may not fit perfectly into the Vespa. If it doesn’t, grab a grinder or some sandpaper.
Take the grinder or sandpaper to the black plastic to open up the hole by a couple millimeters to make it fit.
Depending on which LED option you pick, this may not be necessary. See options above.
Step 5: Reassemble
Put everything back together in reverse order you took it apart.
If you haven’t already tested the LED headlight you should do so before you put everything back together.
Additional Vespa LED upgrade tips and Q&A
Here are some additional notes from the installation, and questions I get asked a lot about the Vespa LED headlight upgrade.
Why I chose this particular LED headlight:
300% brighter than the original headlight.
At 1,600 lumens, it isn’t the brightest LED on the market and won’t blind oncoming traffic.
Only takes 15 watts to power, instead of 45 watts to 60 watts that the factory headlight needs.
By switching all of your lights to LED you can save enough wattage to run accessories like heated grips and still use less power than the bike would draw from factory.
Can I use this LED headlight in all Vespa scooters?
This headlight will not work in most 50cc Vespas. If you have a 50cc Vespa and would like to upgrade to an LED headlight you should use this bulb instead.
Other than 50ccs, the LED headlight I suggest will work in any Vespa that uses H4 headlights, which includes most modern Vespas since around the year 2000.
How can I get rid of the plastic shavings in my headlight cover?
The easiest way is to hold it upside down and blow some compressed air into the cover. Alternatively you can hold it upside and vacuum the opening while you hit the top.
How does it look in the end?
Ultimately a Vespa LED headlight upgrade is definitely worth it. Not only is the light brighter, it’s also much fuller and helps me to identify things in the dark from much further away because I can see better. That gives me more time to react, helping me to avoid potential dangers. It also helps me to be seen, without being a nuisance to oncoming traffic.
Here are some shots from the garage:
Another way to reduce the load on your Vespa is by changing all of your running lights, including your brake light, to LED lighting. I’ve found some awesome Flashing LED Brake Light For Motorcycles. They make it much more obvious to nearby traffic when I’m decelerating or coming to a stop. Due to the quick bright flashing nature of the bulb, I believe it lets drivers notice my change in speed sooner than a steady light coming on would.
My local laws state that flashing red lights like this are okay, provided the flashing does not exceed five seconds, which this bulb does not. It’s a good idea to ask a cop where you live, but typically no one is getting pulled over for upgrades that help keep riders safe. This is a cheap and non-offensive safety upgrade, which is just as easy as the headlight upgrade we just discussed.
If you’re looking for other Vespa mods, you might want to start by simply adding a cell phone mount on your Vespa scooter. It can be a great way of adding navigation to help you find the quickest ways to get to where you need to go, without having to stop and fiddle with your phone.