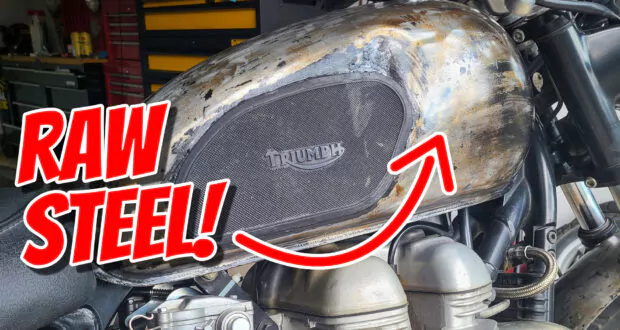
Exposing the bare metal of your motorcycle’s gas tank and fenders is a great way to make it stand out. It’s also perfect for getting rid of a paint color you don’t like, for very little cost.
The easiest and most cost-effective way to expose the bare metal on your motorcycle is to remove your metal gas tank and fenders, pour paint remover on them, and then scrape it off with a plastic scraper. You may want to apply another round or use super fine sandpaper if you want your motorcycle’s metal to really shine. Lastly, finish with several layers of high heat clear coat.
Today I’ll show you how to expose the bare metal on your motorcycle, and why it was the right choice for this Triumph Bonneville.


How to get a bare metal motorcycle finish
What you’ll need
Optional:
- Fuel siphon
- Super fine 800 grit sandpaper
- Gloves, mask or respirator, eye protection
Step 1: Remove the fenders and gas tank
The first thing I did to get a bare metal look on my Triumph Bonneville was remove the front and rear fenders, and then remove the gas tank.
On the Bonneville you remove the rear fender by taking off the seat, unclipping the wiring harness going to the tail light and turn signals, and removing the four bolts that hold the fender to the frame. Next I took the front wheel off to be able to remove the front fender without damaging it.
Removing your gas tank is best done with the tank as empty as possible. You should ride until you’re nearly out of gas, or siphon the gas out of your tank. If your motorcycle is carbureted you’ll need to turn the fuel petcock to the off position. Remove any hardware securing the gas tank to the frame, and any cables or hoses running to and from the gas tank, and take the tank off. It’s a good idea to have some rags or containers available in case you need to catch any spills.
On the Bonneville the tank has two bolts under the front of the seat holding it to the frame. You can remove those, lift the back of the tank upwards slightly, and slide the entire tank backwards for removal, after disconnecting anything going to the tank.
Now is a great time to apply tape over anything that needs to be protected from paint remover and clear coat, such as your fuel cap, fuel petcock, tank pads or badges, etc.
Step 2: Stripping and scraping the paint off
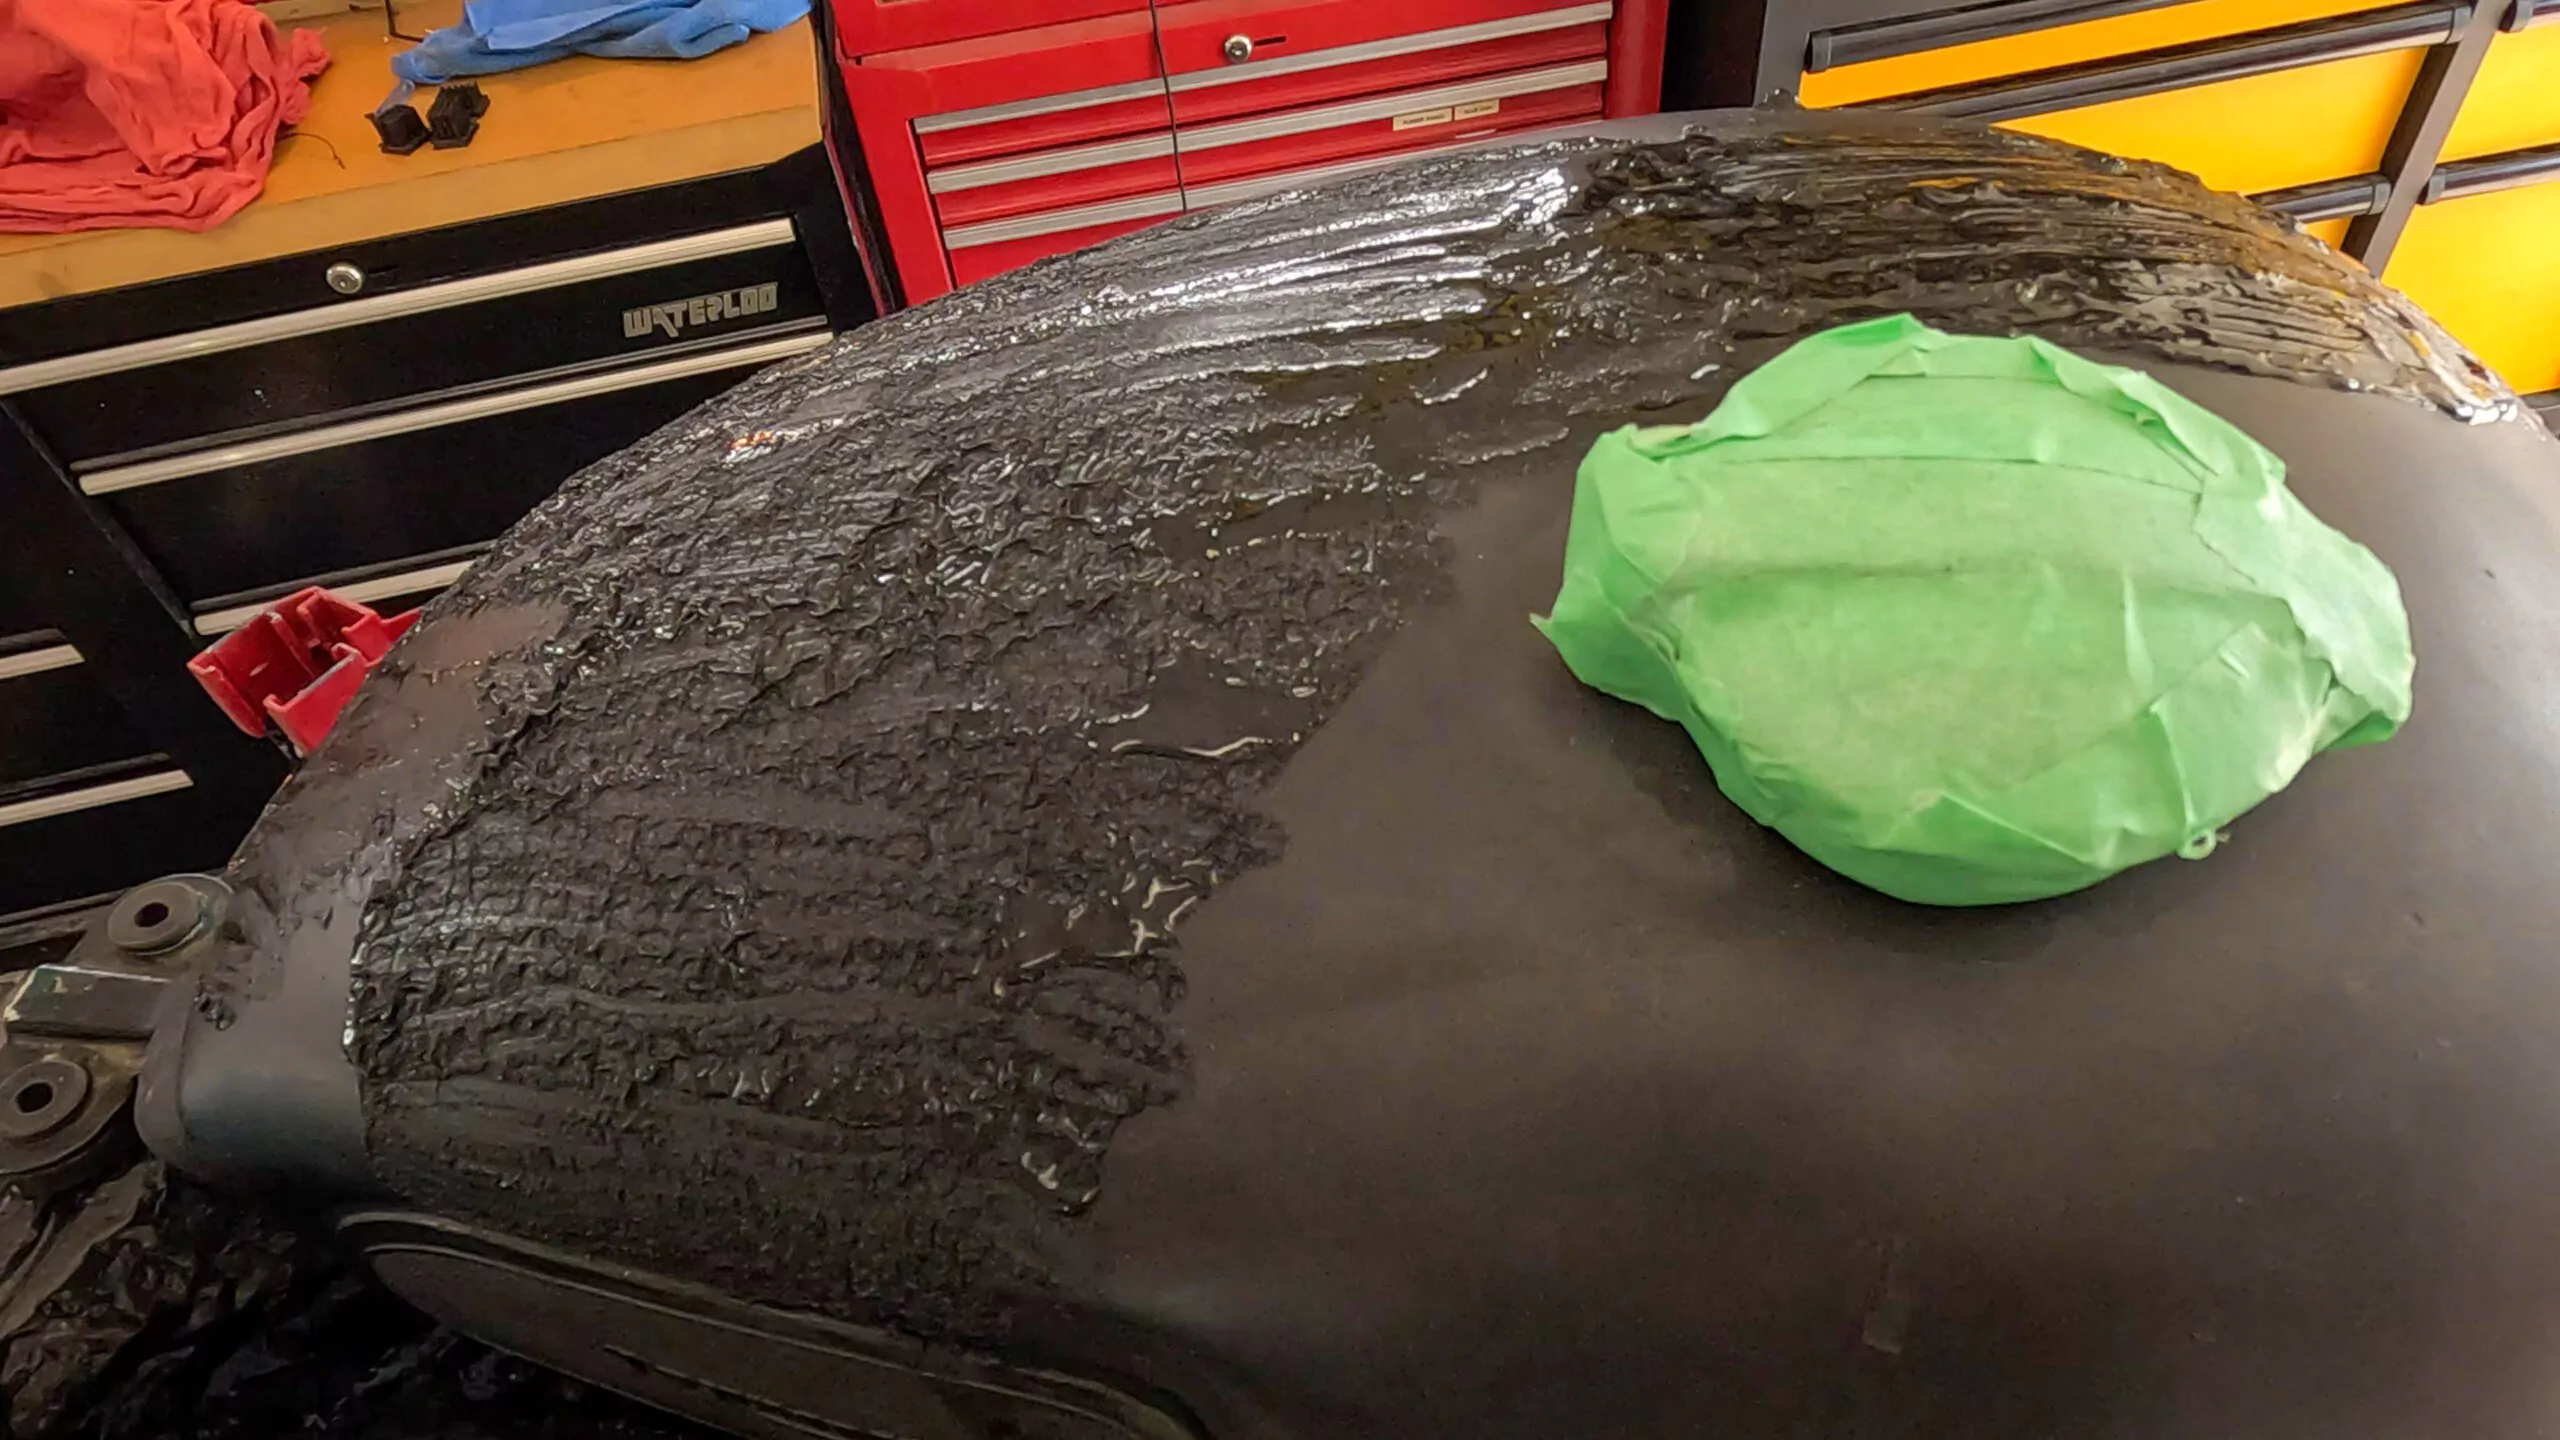
It’s time to apply the paint stripper. Once you do this, there’s no going back! I used Super Stripper and was super happy with the results. I’d recommend gloves, eye protection, and an N95 mask or a respirator at this point.
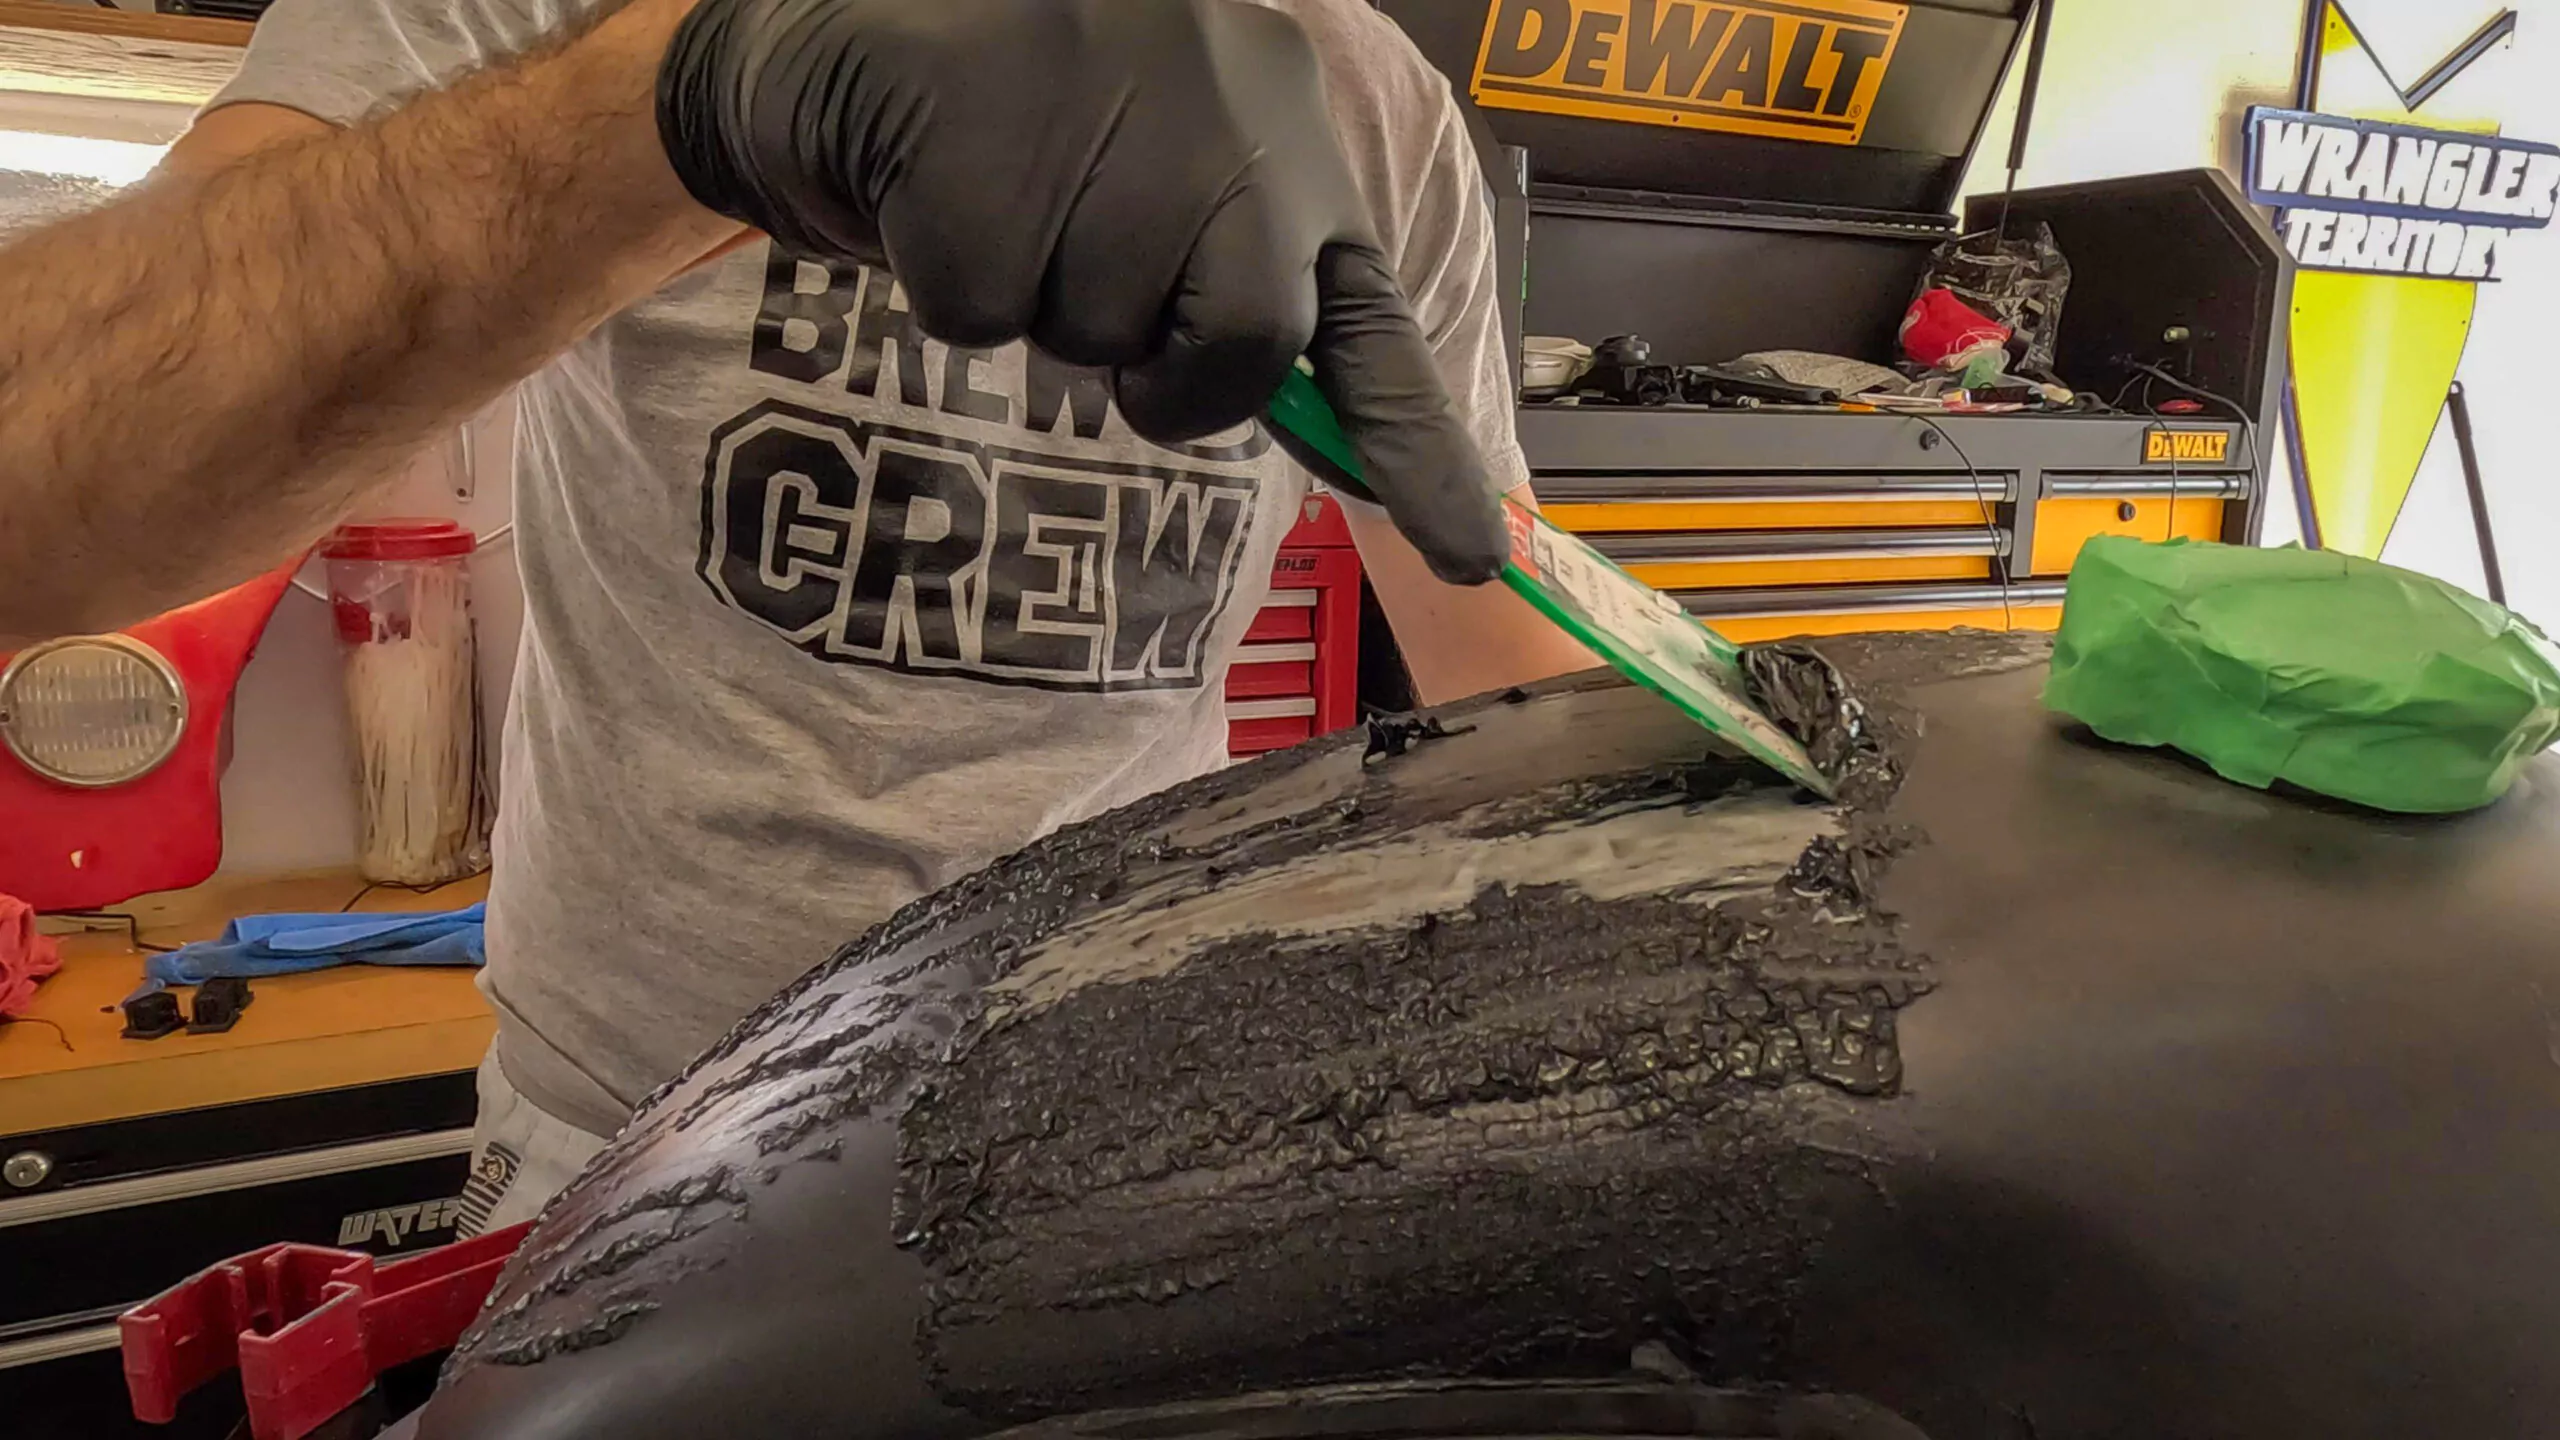
The instructions said to pour the Super Stripper on to the paint, and spread out with a brush until it was about 1/8th” (about 3mm) thick. Then just let it sit for fifteen minutes and watch the paint start to peel off. You can work on the other motorcycle parts while you wait. After fifteen minutes you can take your plastic scraper to the metal surface and most of the paint should scrape right off without damaging your motorcycle parts.
At this point you’ll need to decide if you want to apply a second layer of paint stripper to get any paint leftover, or start sanding. If you want a bit of an unfinished look, you can leave the tank alone, like I did with the Bonneville (I’ll explain why later). If you want a really well finished look, it’s time to start sanding down to an 800 grit sand paper finish.
If you go with sanding, I would recommend picking one direction and sticking with it from start to finish. It’s best to either pick up and down, or side to side, but not both.
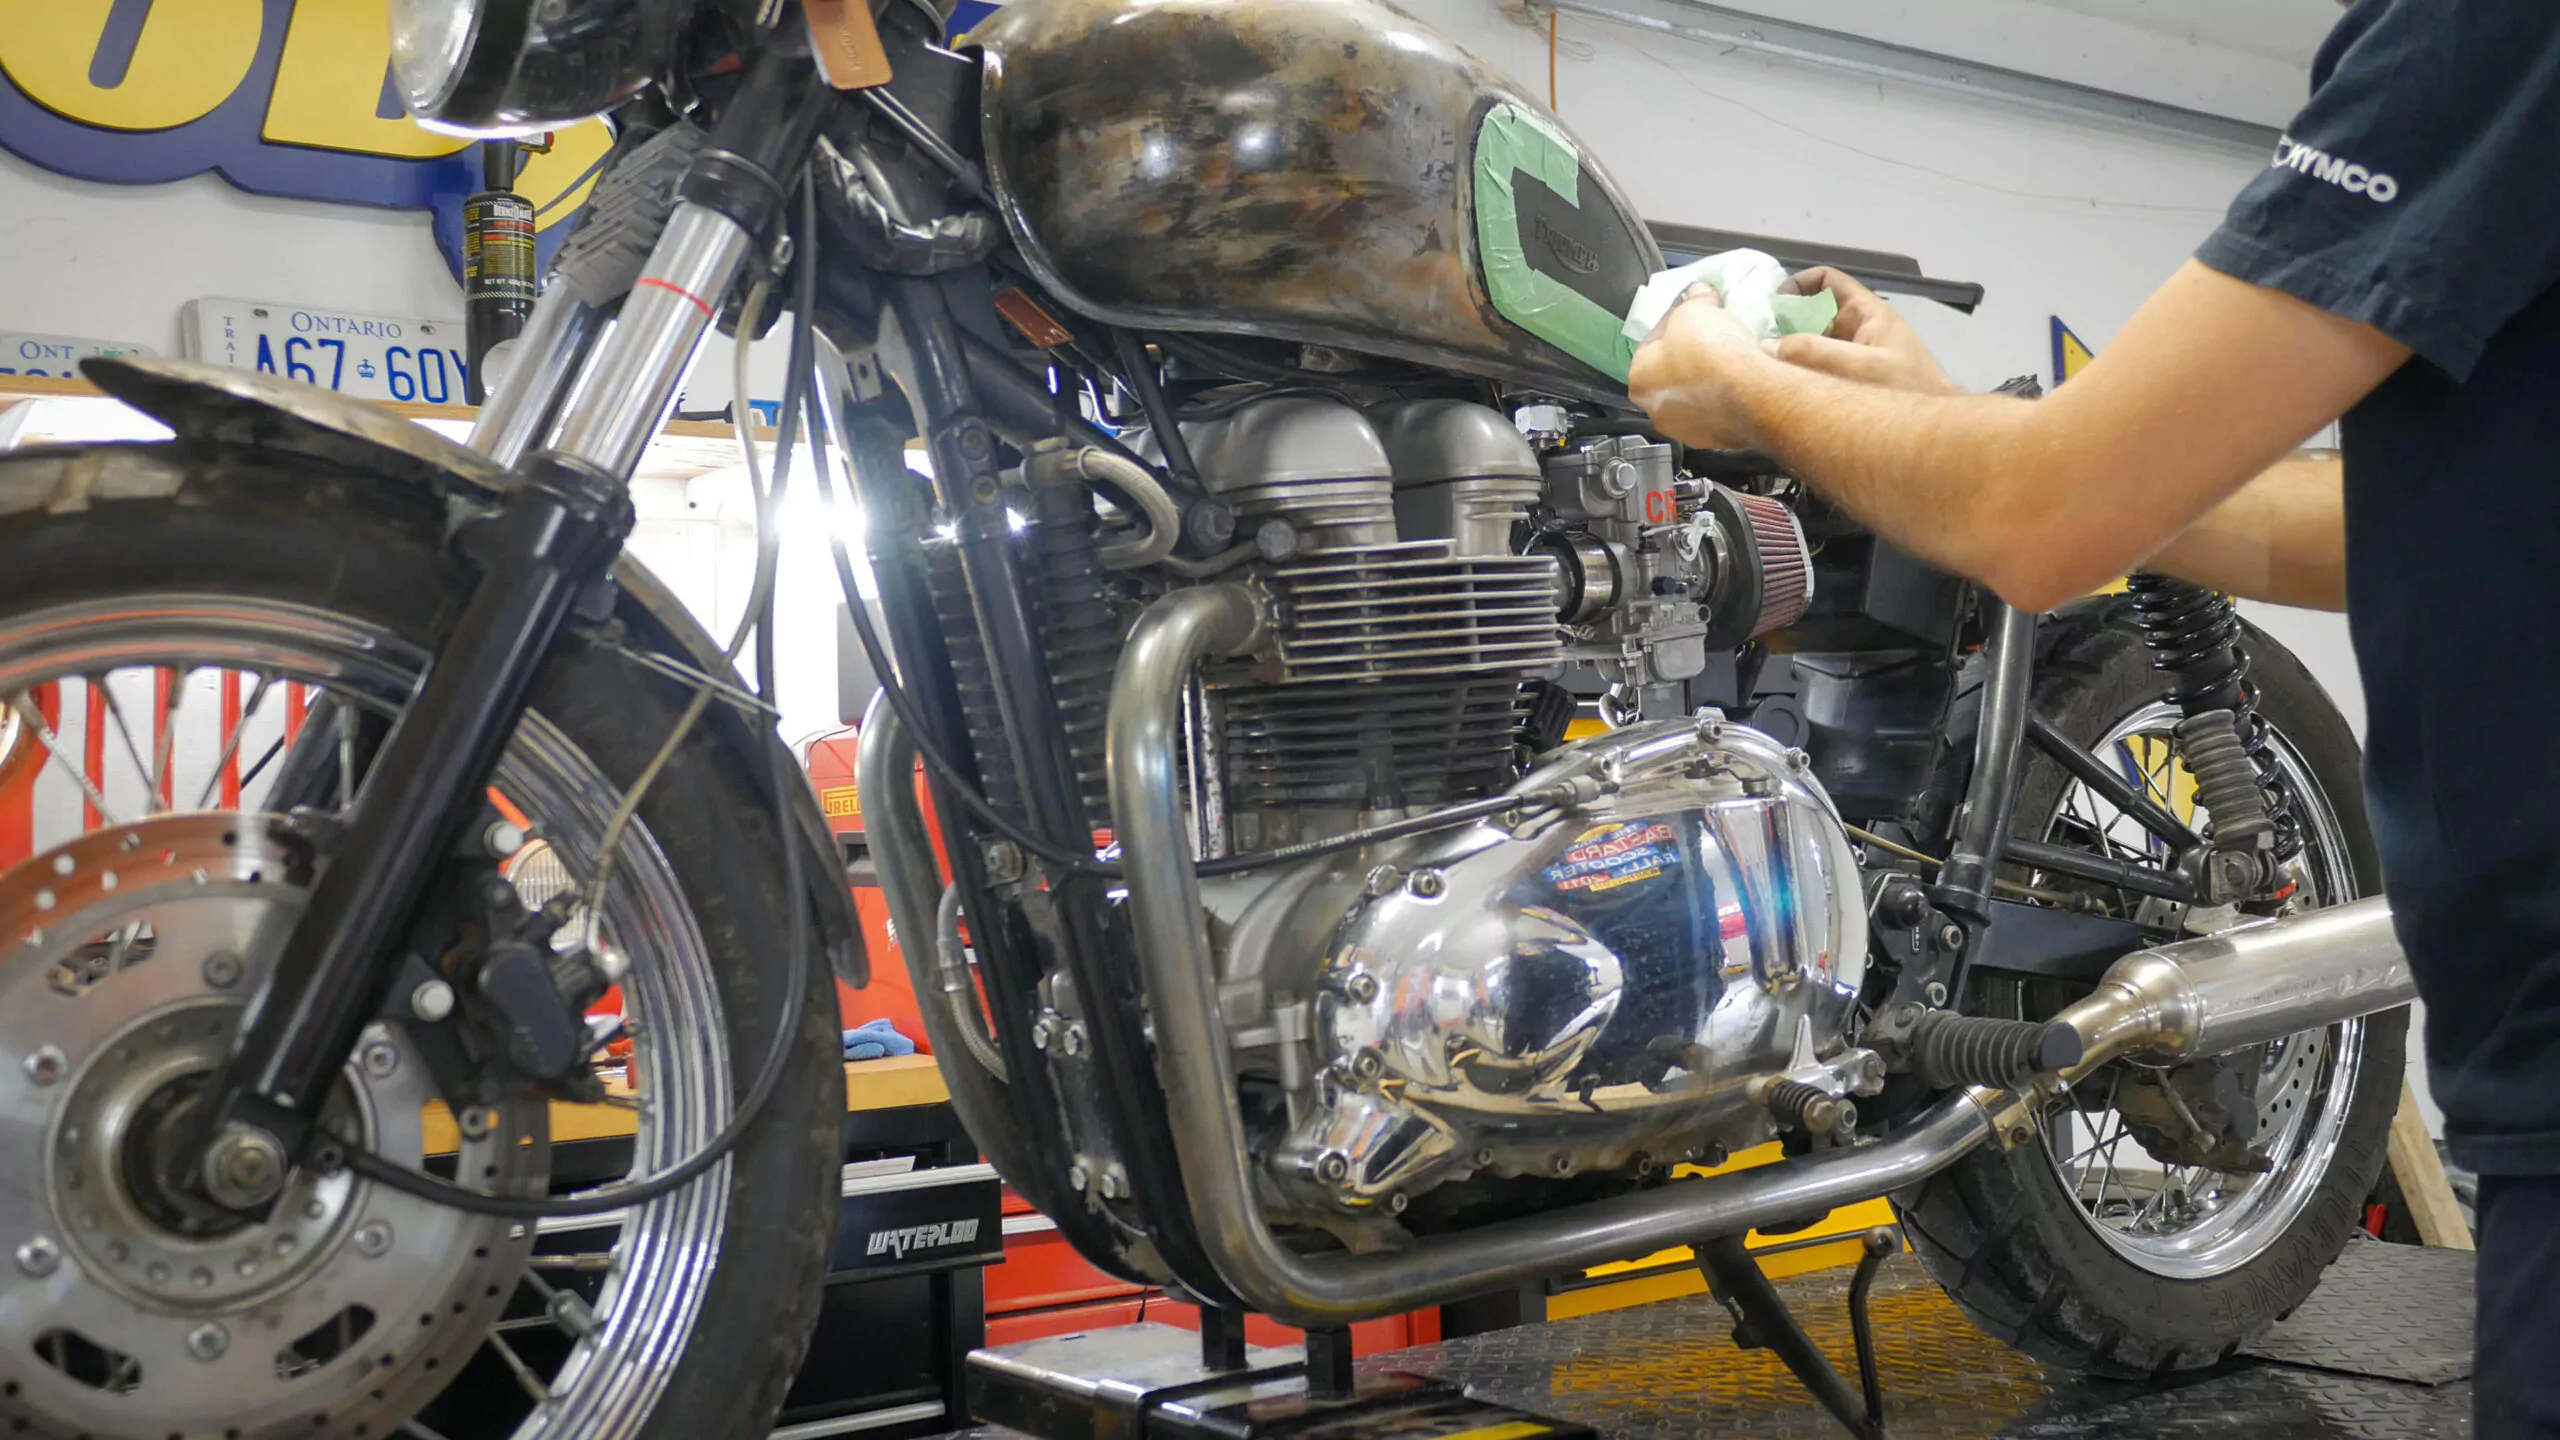
Once you’re happy with the finish, clean off any remaining paint stripper residue with a damp cloth and then dry the motorcycle parts with a dry cloth.
Step 3: Clear coating
Once you’ve cleaned your motorcycle parts you should dry and clear coat them to protect the finish. If you don’t clearcoat within the first few days, rust may start to form on your metal motorcycle parts. You should use a high heat clear coat as your motorcycle will get hot with use, preferably from a high quality, reputable brand.
This high heat clear coat from Dupli Color was what I used on the Bonneville and it was super easy to work with and didn’t run at all. Even as a first timer I had no issues applying it. There are some instructions to carefully follow however:
- Sand or apply a primer before clear coating.
- Do not clear coat if the humidity is over 60%, so don’t clear coat on rainy days.
- Shake the can for 1 full minute before use, and at least 10 seconds in between sprays.
- Hold the can from 8″-10″ away from what you’re spraying.
- Apply all coats within 1 hour, allowing 10 minutes in between coats.
- Your first two coats should be light coats.
- Your third coat should be a medium coat.
- Your last two coats can be heavier.
- The clear coat will dry in about an hour.
- Should you need to apply any more coats (you won’t), you’ll need to wait a week before doing so.
Clear coating was really easy because I found some PDF instructions from Dupli-Color online, and everything was simple and high quality. Having three parts to clear coat on the Triumph Bonneville meant I could keep changing from one part to another and have minimal time spent waiting around until I could apply the next layer.

Step 4: Reassembly
After an hour your bare metal motorcycle parts should be glossy, protected, and ready to be reinstalled back on your motorcycle. I waited until the next day to do reassembly of the Triumph Bonneville because I was only spending a couple hours a day on this project. If you wanted to be extra safe you could wait a few more hours before installing the parts back on to your motorcycle, but the clearcoat enamel was dry after about an hour if you really don’t want to wait.
Overall I was really happy with the bare metal motorcycle look. I wasn’t keeping track of time but the project probably took at least six hours from setup at the start to clean up at the end. I did a couple hours a day over several days as I found the free time, usually in the evenings to beat the summer heat.
This was a fun project that wasn’t too difficult, provided you’re comfortable removing wheels, fenders, and gas tanks yourself.
I’ve never tried exposing the bare metal on my bike, but a buddy, Jake, tackled a similar project with his Honda CB550. The project took a few weekends, but the bare metal finish is sexy and I wanna try it out myself.
Wondering, have you ever considered exploring different paint styles or graphics alongside the exposed metal look? 🎨✨ I’m thinking of tweaking my own motorcycle. Any thoughts or suggestions? Keep the awesome content coming!
Hey Luis. I went with a totally bare metal tank on my Moto Guzzi V7, no leftover paint remaining. However I’m planning on either adding a hand painted touch from a really talented friend, or else some of aftermarket tank badge, I’m not sure what yet. What’d you have in mind?