Here’s how to bleed the brakes on a Honda CL-350 café racer.
For those who missed Part 1: I picked up a 1973 Honda CL350 café racer that’s been sitting for nearly five years. I’m told it ran just fine when it was put away, but we’ll see about that. In part one we checked on the tires, spark plugs, and found where the (dead) battery was hidden. There’s a lot to do to restore an old motorcycle.
In Part 2, we’ll be going over how to bleed the brakes on a Honda CL 350 or a Honda CB 350. I’ll show you everything you’ll need, and how I bleed the front brake on my café racer.

Click the little unmute button in the bottom left corner to unmute the video.

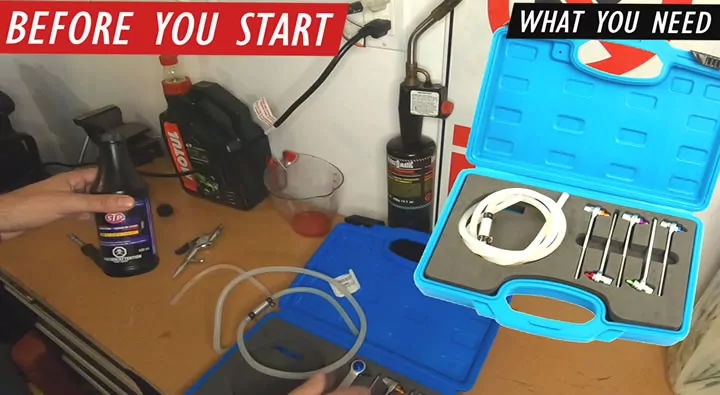
What you’ll need to bleed the brakes on a Honda CL-350 / CB-350
There’s more than one way to skin a cat, but here a few tools I use to make bleeding brakes quick and easy on motorcycles. You might not need all of these things, some people just use a water bottle and some hose, but the more you have the easier it is to succeed and the less likely you are to make any mistakes.
- Brake bleeder kit: Used to hook a hose up to the brake caliper for bleeding the brakes, makes it an easy job and avoids letting any air into the line which could negatively impact your brake performance.
- DOT-4 brake fluid: The Honda CL-350 calls for DOT-4 brake fluid, so I recommend you stick with what the engineers at Honda say is best for the bike.
- Screw driver: To remove the screws on top of the master cylinder.
- Small siphon or syringe: To get out some of the brake fluid from the master cylinder to speed up the job.
- Empty bottle that seals tightly: For getting rid of the old brake fluid.
- Rags: Stuff to keep your bike protected from the DOT-4 brake fluid, like rags, or maybe even tape.
Again, you don’t necessarily need all of this stuff to bleed brake fluid on a motorcycle, but this is what I use. Given that brakes on motorcycles are pretty important, I like to play it safe and be extra careful. You might also want to check out this article on how to tell if your brake fluid has gone bad before we get started.
UPDATE: After two years, I just put together a lengthy review on the best motorcycle table lift. Check it out.
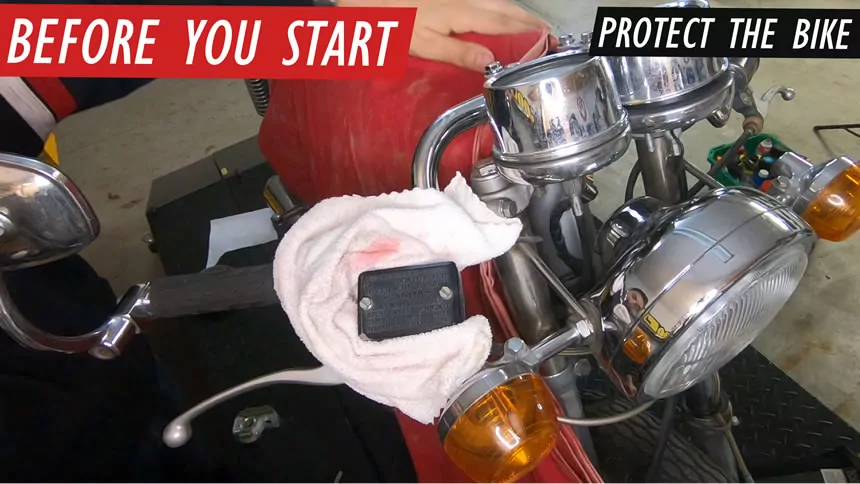
Prep work to protect your motorcycle before bleeding the brakes
The Honda CL-350 takes DOT-4 brake fluid. DOT-4 does a great job as a brake fluid, and most modern motorcycles still count on it. The only downside to DOT-4 brake fluid is that it absolutely devastating to any paint or finish it encounters. That’s why you need to do a good amount of prep work before starting to bleed your CL-350 café racer brakes.
The first thing I do is actually put some Scotch tape around the master cylinder, the reason is: if any brake fluid spills over, rather than running along the outside of the master cylinder, and ruining the finish, it’ll run OVER the tape, which creates a barrier. If you’ve got a smooth hand, you can skip this, but if you’re clumsy like me, think of it like “no glove, no love”, and grab your roll of tape.
The second thing I do is wrap a bunch of absorbent rags all around the master cylinder, and I also cover anything else (like my motorcycle gas tank) that I don’t want getting ruined either. Cover anything. That includes your motorcycle table lift if you’re working on one.
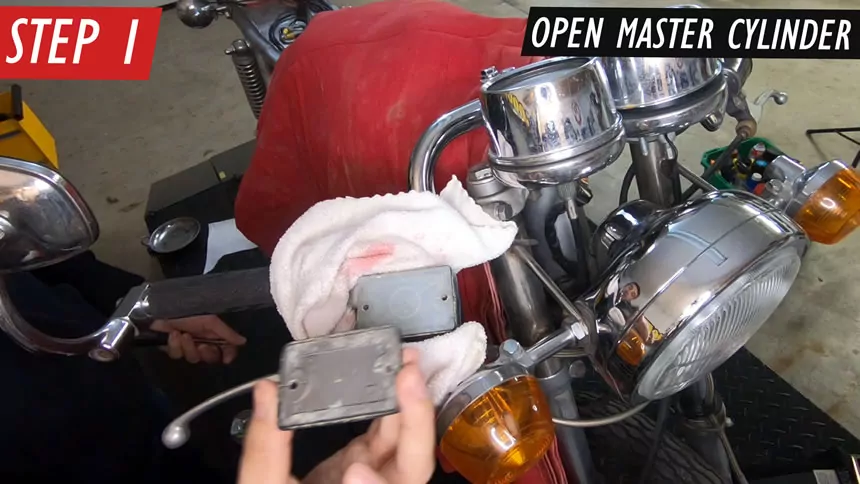
Step 1: Opening up the master cylinder
The master cylinder cover is held on by two screws that you should be able to easily unscrew. A magnetic tray helps to keep your screws from getting lost.
Warning: The screws, the cover, and all of the parts beneath it may be wet with brake fluid, so as you remove more and more parts, some may be wet, and the DOT-4 brake fluid could ruin the finish of whatever you put these pieces on. Have somewhere special already set up to put these items before you begin.
Under the metal cover you’ll find a plastic cover. The plastic cover’s job is to hold in place the black rubber diaphragm beneath it. Be careful with the diaphragm: it will splash.
Once the diaphragm is off, you can see the color of your CL350’s brake fluid.
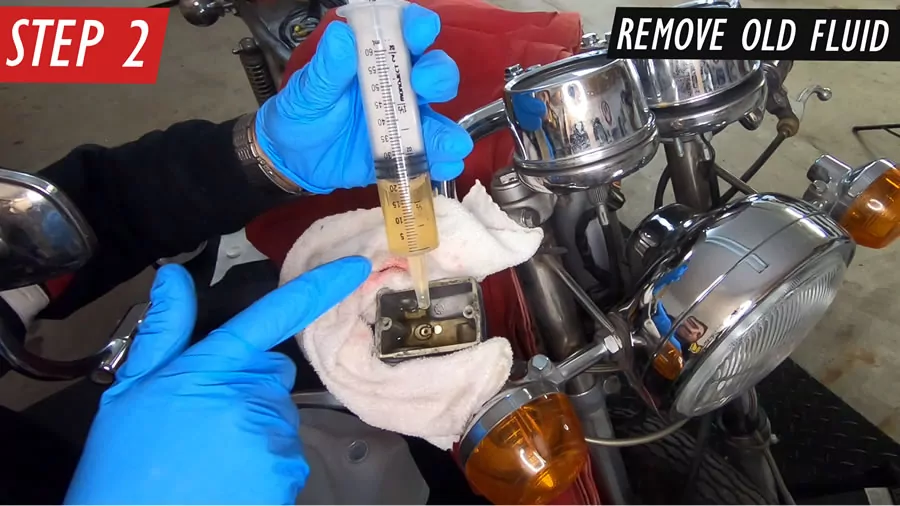
Step 2: Remove the old fluid from the master cylinder
At this point I like to use a small little syringe to suck out as much of the old brake fluid as I can without introducing any air into the brake line.
Warning: Introducing air into your brake line will negatively impact the performance of your motorcycle’s brakes. Air can be introduced into the line from the hole in the bottom of the master cylinder, or from the bottom of the brake line. Don’t allow air to enter your brake line.
Be sure not to draw too much of the old fluid out of your master cylinder. Look for the hole at the bottom of the master cylinder. If you draw enough fluid to uncover that, you risk allowing air to get into your brake line, and we don’t want that to happen.
You should pay special attention to what color your brake fluid is. The darker it is, the more overdue for a change it is. Your brake fluid should be relatively clear.
Then pour some fresh DOT-4 brake fluid back into the master cylinder. Pay special attention to the fill marks.
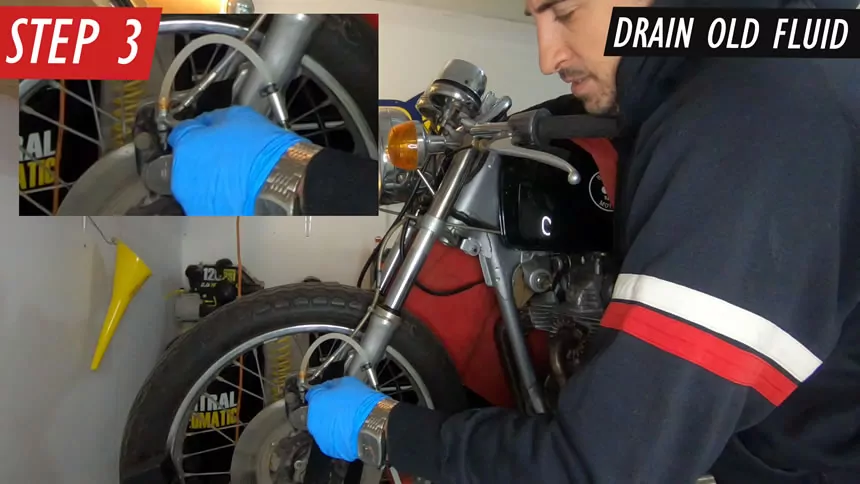
Step 3: Drain the old fluid from the brake line
First, remove the dust cover from the brake caliper bleeder nipple.
Next, find the wrench from the brake bleeder kit that fits your brake caliper bleeder nipple.
Then, hook up the hose included in the brake bleeder kit to the brake bleeder. You’ll notice an arrow on the hose. That arrow should be pointing away from your motorcycle and towards the container that your fluid will be draining in. The system uses a one-way valve, so fluid (and air) can only transfer OUT, not into the bike, which is why the arrow is important.
The goal is to get the old motorcycle brake fluid out through the brake line, without introducing any air into the brake line, either from the bottom going up, or from the master cylinder going down.
The process of bleeding the brakes is as follows:
- Squeeze the brake lever and hold it squeezed, don’t let go.
- Turn the wrench around the brake bleeder to drain some brake fluid out.
- Bring the wrench around the brake bleeder back to it’s original (shut) position.
- Release the brake lever.
When you do this, you’ll find some brake fluid comes through the line. By keeping pressure on the brake lever, you hold pressure which stops the brake line from taking in air. That’s why following the proper order is important.
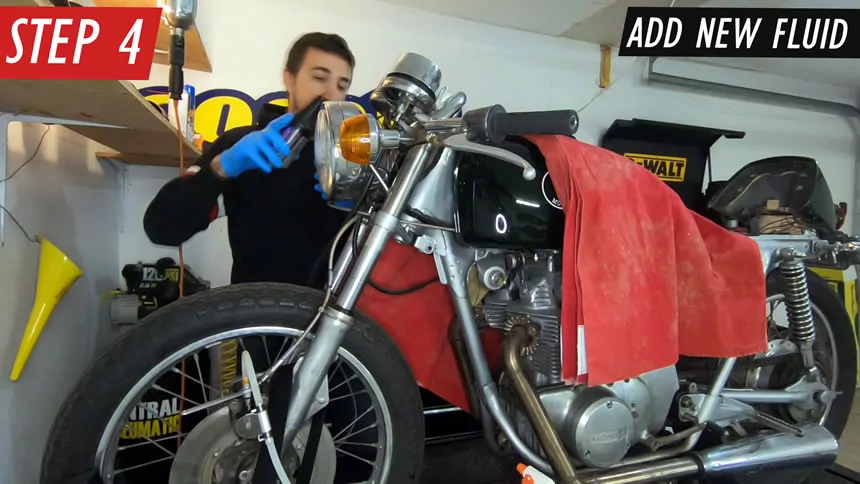
Step 4: Adding new brake fluid along the way
After repeating the process of bleeding the brakes two or three times, the brake fluid in your master cylinder may start to get low, so now it’s time for the rest of the process:
- Check to see if the brake fluid master cylinder is getting low.
- Top up the master cylinder with fresh DOT-4 brake fluid if necessary.
- Repeat the process until all of the old (dark) brake fluid is out of the bike and only new (light) brake fluid is coming out.
Never let your master brake fluid get too low or it will start to suck air into your brake line.
If you see any air bubbles in the fluid coming out of the bike, you have air in your lines. Keep on repeating the process until you see no more bubbles coming through.
If your motorcycle has a rear disk brake, you would do the same thing on the rear, but holding down the rear brake foot lever instead.

Step 5: Put everything back together
Now it’s time to put everything back together. Keep on being careful, as DOT-4 is just as dangerous to your paint and finish after your fluid change as it is before and during.
Now you know how I bleed the brakes on a Honda CL-350 café racer, but you can apply this to any Honda twin from that era, like the CB-350, and others. Really though, bleeding the brakes is pretty universal, unless you’re dealing with an ABS-equipped motorcycle, so you can use this article and video as a guide for how to bleed the brakes on a motorcycle that doesn’t have ABS.
COMMENTS: Was this helpful? Do you have any questions? Please leave a comment!
Update: See Part 3 of the series, where I drain the old gas out of the CL-350.
Love those 70s Honda 350 model motorcycles ! Just got through restoring a 1971 SL350 .The bike has only a little over 5,000 miles on it .The speedometer still works and the motor is in perfect condition. It was in ruff condition but not butcher or wreck..I removed everything from the frame .Frame was repainted and everything else was polish, painted are new parts were added. Now it looks like it just came off the Show Room Floor!!
Attaboy! Way to go Steve. Here’s the update to this story: https://youmotorcycle.com/honda-cl350-cafe-racer-part-4-can-a-48-year-old-motorcycle-still-run.html
I’ll be sharing my test drive next week. Some things I really like about the bike, some things I don’t.