
The Suzuki Boulevard S40 (aka Suzuki Savage 650) is an easy motorcycle to work on and maintain yourself. Changing the oil and filter, one of the most common maintenance jobs, requires only a 5mm allen key (or hex key) and a 14mm wrench (or adjustable wrench). We’re going to cover how to change the oil and filter on a Suzuki Boulevard S40, Suzuki Savage 650, or Suzuki LS650 yourself.
The Suzuki Boulevard S40 oil and filter change can be divided into these key parts:
- Before you start
- Step 1: Drain your old oil
- Step 2: Remove and replace the oil filter
- Step 3: Replace the oil drain plug
- Step 4: Refill
- Step 5: Check oil level
This step-by-step guide will take you through everything you need, what to do before you even get started, and the five easy steps for changing your own oil and filter. I’ve linked to the parts that I use so you know where to find them, included pictures for every step, and even created a video showing you every step along the way. Let’s get started!


What you need for a Suzuki Boulevard S40 / Suzuki Savage 650 oil and filter change
- 2 litres of 10W-40 semi-synthetic motorcycle oil (you can also mineral oil or full synthetic if you’d like)
- K&N KN-137 oil filter
- Torque wrench (even this cheap $35 one promises to be within 4% accurate)
- A 3/8 drive 5 mm bit
- A low profile oil drain pan
- 5 mm allen wrench (or hex key)
- 14 mm wrench (or set)
- Gloves, rags, and other supplies to clean up any spills
- This Black Widow motorcycle table lift isn’t necessary but it sure made the job easy and it wasn’t too expensive (full review here)
- Crush washer (may or may not be necessary)
Prep work before you start your oil and filter change
There are a few things to do before you get started changing the oil and filter on your Suzuki Boulevard S40 or Suzuki Savage 650.
For starters, let the motorcycle run for five minutes, this heats up the oil, making it more viscous and allowing more of it to flow out of your motor more quickly. After you’ve let the oil run for five minutes, let it sit for three minutes. This gives the motorcycle time to cool down a bit so it will still be warm, but shouldn’t be so hot as to risk burning you when you’re working on your Suzuki motorcycle.
You should also open up your oil fill cap before getting started. These can sometimes break or get stuck. If you discover your fill cap is damaged when you still have oil in your tank, you can simply ride the motorcycle to the shop, but if you find out the fill cap is damaged after you’ve already drained your old oil out you’ll be stuck having your motorcycle towed.
You might also want to check your oil level before getting started. Checking your oil level will let you know if your Suzuki Savage or Boulevard S40 has been leaking oil or burning oil since your last oil change. See Step 5 further down this guide for how to check your oil level.
How to change the oil and filter on a Suzuki Boulevard S40 / Suzuki Savage
Changing oil on the Suzuki Boulevard S40 / Suzuki Savage is very simple and requires only very tools, if you follow these steps you’ll be able to do it yourself with ease.
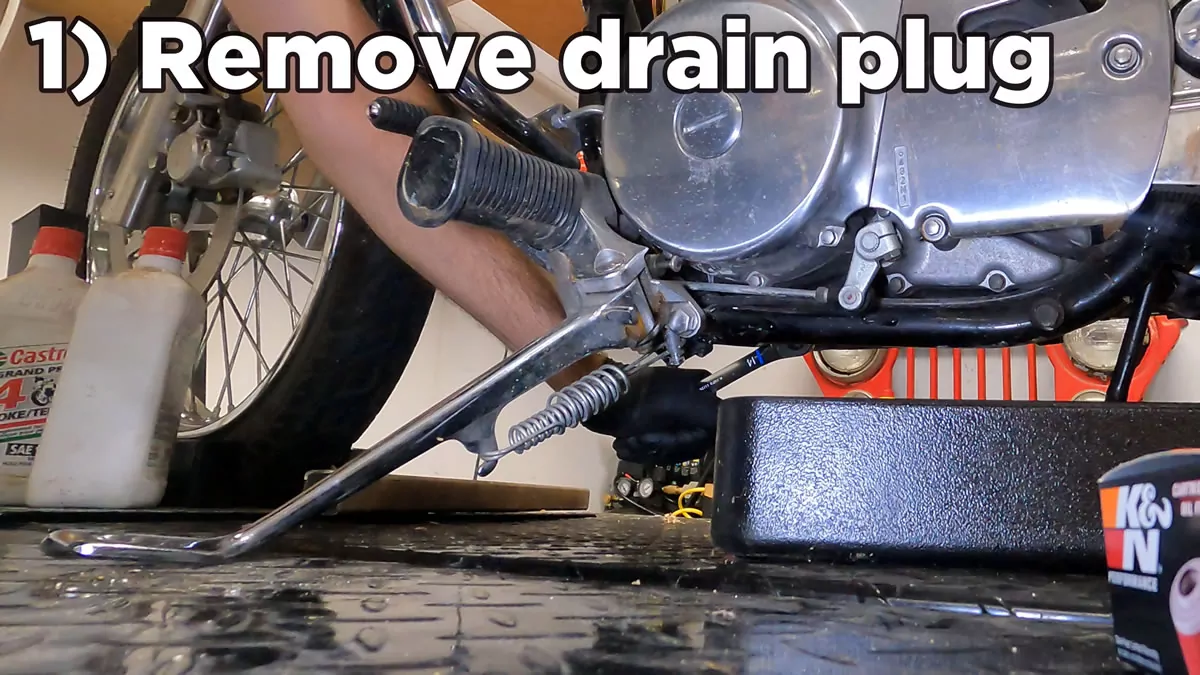
Step 1) Remove the drain bolt to drain the oil
The Suzuki Boulevard S40 / Savage 650 oil drain plug is on the motorcycle’s left side, behind where the kickstand pivots from.
I use a 14mm ratcheting wrench because most sockets won’t fit between the motor and the frame.
Have your low profile oil drain pan ready and remember the oil could be hot so be careful.
Check the drain plug for any signs of debris from internal engine wear.
Wipe the drain plug and washer clean but do not reinstall it until after replacing the oil filter.

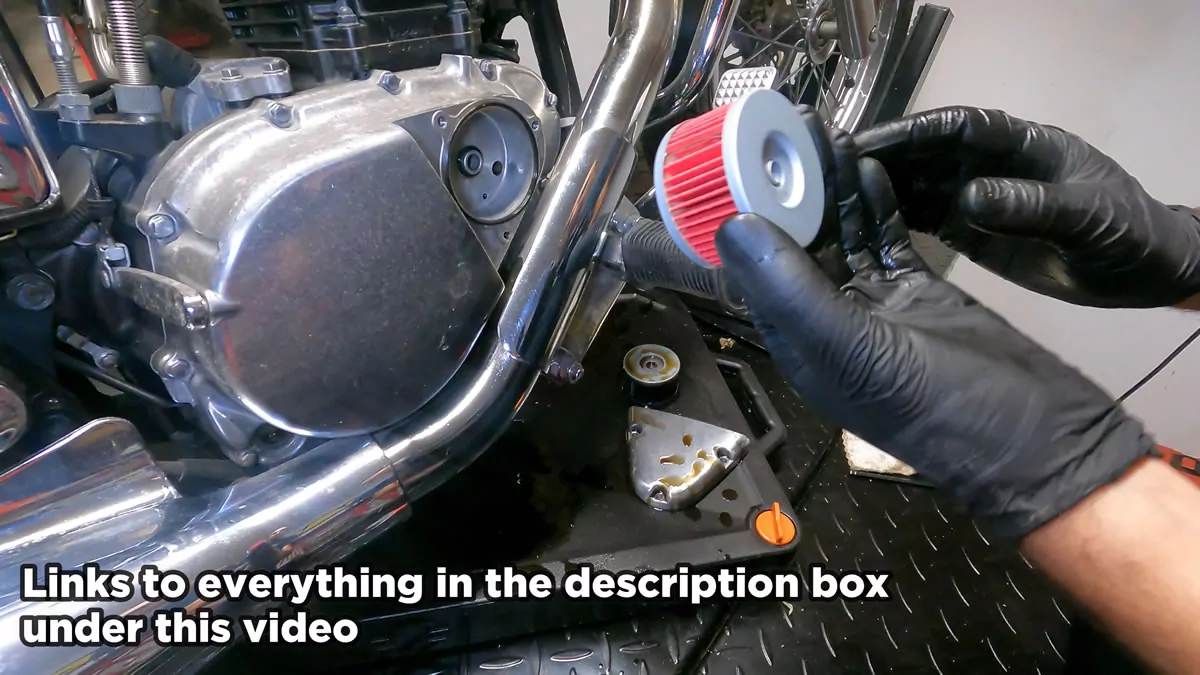
Step 2) Remove and replace the oil filter
The Suzuki Boulevard S40/ Suzuki Savage’s oil filter is located on the right side of the motorcycle beside the rider foot peg.
The oil filter is covered by an oil filter cover, a spring, and a gasket (seal).
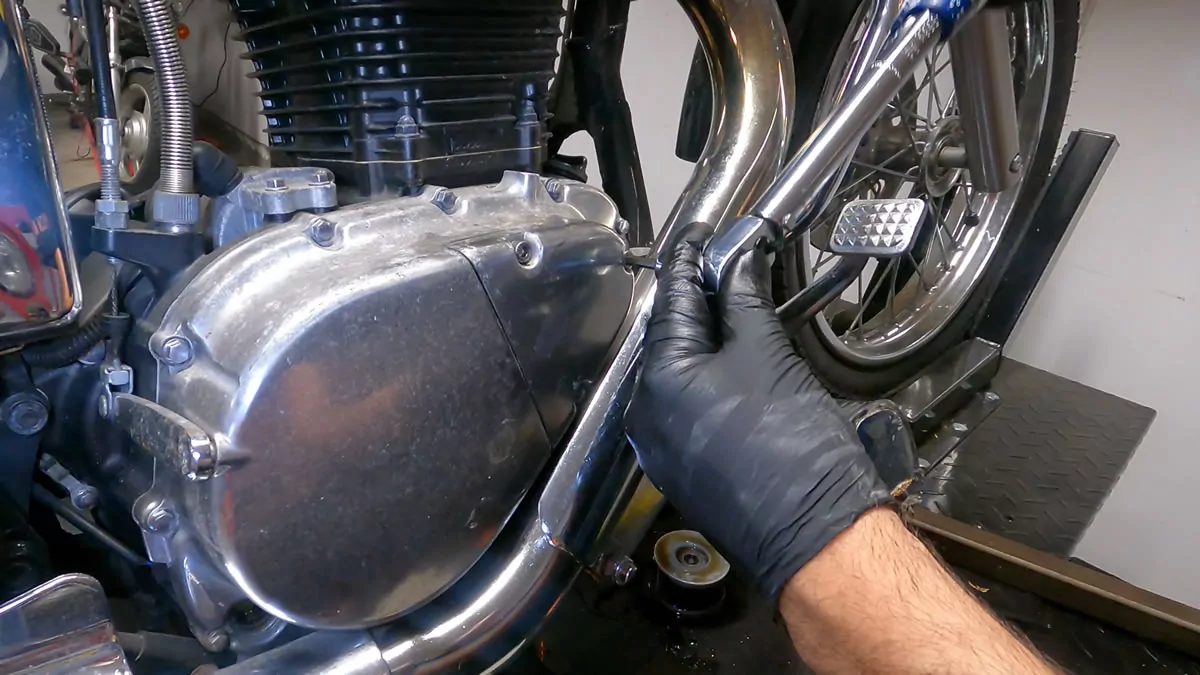
Remove the oil filter cover by using a 5 mm allen wrench to remove the nuts holding it in place.
You may want to put some cardboard between the motor and the exhaust to stop the oil from spilling onto your exhausts.
Carefully remove the oil filter cover, spring, and oil filter, be careful not to take the inner little black seal out.
Inspect the oil filter gasket for any signs of wear and consider replacing if necessary.
Clean out old oil with a clean rag.
Make sure that the cover seal and the oil filter seal are both in good condition and replace if necessary.
Install the new oil filter, making sure the spring is still firmly in place.
I recommend first time DIYers use a torque wrench and a 3/8 drive 5 mm bit on the 5 mm bolts.
A torque wrench allows you to set how tight a bolt should be screwed in.
Using a torque wrench you won’t overtighten (damaging your motor casing) or undertighten (causing a leak) your drain bolt.
The torque specification for the 5mm bolts are 6-8 Nm or 4.4 to 5.9 ft-lb.
Step 3) Replace the oil drain plug
When your Suzuki Boulevard S40 or Suzuki Savage is done draining old oil out, re-install the oil drain plug and washer.
Check the washer for any signs of wear and replace it if it looks worn.
Having someone hold the motorcycle upright will make it easier to get the drain bolt back in.
The torque specification for the drain bolt is 12-18 Nm or 8.9-13.3 ft-lb.
Unfortunately it would be almost impossible to fit a torque wrench in this place, so aim for firm, but not too tight.
Too tight will damage your engine casing, too loose and you have a leak.
Step 4) Refill with new oil
Pour two liters of clean new 10W-40 motorcycle oil into the Suzuki Boulevard S40 / Suzuki Savage.
You may want to use a funnel to help avoid making a mess.

Step 5) Check your oil level
Run your motorcycle for a minute, the oil light may come on for a second and then turn off.
With the motorcycle on flat ground, use a motorcycle wheel vise, or have a front sit on your motorcycle to hold it fully upright.
Check the oil level in the oil window on the right side of the Suzuki Boulevard S40 / Suzuki Savage 650.
The markings on the side of the window indicate the upper and lower limits (minimum and maximum).
If the oil is too high, open up the drain plug to let a little oil out.
If the oil is too low, add a bit more oil.
Repeat until the oil is between the upper limit and lower limit markings when the bike is fully upright.
Conclusion
Changing your oil on a Suzuki Boulevard S40 or Suzuki Savage 650 is pretty easy. There are five steps to follow but they aren’t very difficult. If it’s your first time you might want to invest in some of the tools mentioned in this article, but these are tools that you can on just about any motorcycle for the rest of your life. Compared to what you would spend having the oil changed at the dealership, they pay for themselves immediately.
If you have any questions, please feel free to leave a comment down below. If you found the video and this guide helpful, please feel free to just leave a “Thank you” comment down below, as that always make my day.
If you’re looking for more content on Suzuki Boulevard S40 / Suzuki Savage 650 service and maintenance, check out my other Suzuki Boulevard S40/Savage 650 guides including how to test your brake fluid, how to replace the brake fluid, how to replace your battery, and how to tow your Boulevard S40.
Awesome vids! No unnecessary stuff, straight to the point! You saved me time and money. Wish everyone made them like yours
Place a foam pad on the ground under your hand when loosening the drain plug to save your wrist and knuckles. Use aluminum foil to direct the oil away from the pipes and prevent it from leaking all over the place.
You’re a killer teacher, thanks a bunch!
Thank you. This was very useful. What is the size of the crush washer if replacing it for the drain plug? They’re usually listed in millimetres for the internal diameter.
You can get two of them here. They’re probably cheaper to buy from the dealer. https://amzn.to/3tA7XA8
I don’t know the dimensions.